
Your driveway is one of the first things people notice about your home. It sets the tone for the entire property, and when it’s done well, it adds serious kerb appeal, improves practicality, and increases your home’s value. When it’s done poorly, it cracks, sinks, and costs a fortune to repair.
At M Withall Landscapes, we’ve been designing and installing driveways across Caterham and Surrey for years, and we know what separates a driveway that lasts from one that lets you down.
In this guide, we’ll walk you through the complete installation process, explain what to look for in a contractor, and help you make confident decisions about your outdoor space.
Step 1: Choose The Right Material For Your Property
The first decision, and often the most enjoyable, is choosing what your driveway will be made from. In Surrey, we regularly install four main types:
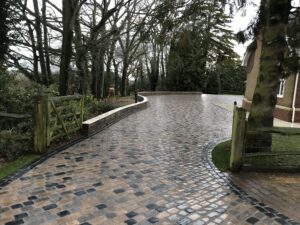
Block paving: A popular choice for its versatility and aesthetic appeal. Available in a wide range of colours and laying patterns, block paving suits both traditional and contemporary homes. Individual blocks can be lifted and replaced if needed, making repairs straightforward. Expect a lifespan of 20–25 years when installed correctly.
Tarmac: Fast to install, highly durable, and cost-effective. Tarmac driveways suit larger areas well and require minimal maintenance. They can be enhanced with block paving edging for a cleaner, more defined finish.
Resin-bound: A premium, modern option that is fully permeable, meaning it complies with UK Sustainable Drainage Systems (SuDS) regulations without requiring planning permission. Resin driveways offer a smooth, elegant finish in a huge range of aggregate colours.
Gravel: An affordable and naturally permeable option. Easy to top up over time, though it does require occasional re-grading and is better suited to properties with lower traffic volumes.
At M Withall Landscapes, we help you weigh up each option based on your property style, budget, expected use, and long-term maintenance preferences, not just what’s quickest to install.

Step 2: Understand The Planning & Legal Requirements
Before any groundwork begins, there are important UK regulations to be aware of. Under permitted development rules, you can install a driveway without planning permission, provided the surface is permeable (such as resin, block paving with open joints, or gravel), or that rainwater is directed to a lawn or border rather than the public highway.
If your driveway crosses a public pavement, you will need to apply to your local council for a dropped kerb. This is a legal requirement that, if skipped, can result in fines or an enforced removal of the completed work. Our team handles all of this on your behalf, including liaising with Surrey County Council where required.
We also carry out a full utilities check before excavation begins, identifying any underground pipes, cables, or drainage runs that need to be protected during construction.
Step 3: Site Preparation & Excavation
This is the stage that separates a professional installation from a poor one. The longevity of any driveway depends almost entirely on what happens beneath the surface, and cutting corners here is the primary reason driveways crack, sink, and fail prematurely.
Our installation process begins with full excavation of the existing surface, whether that’s old tarmac, cracked concrete, turf, or topsoil. Excavation depth typically ranges between 150mm and 300mm, depending on ground conditions, soil type, and the material being installed.
Surrey’s clay-heavy soils, in particular, require careful assessment, as clay expands and contracts with moisture levels. Without an adequate sub-base, this movement transfers directly to the driveway surface.
Any soft spots identified during excavation are dug out further and backfilled with compacted sub-base material to ensure a consistent, stable foundation across the entire area.
Step 4: Sub-Base & Drainage Installation
Once excavation is complete, a minimum 150mm layer of MOT Type 1 crushed stone is laid and compacted in stages using a vibrating plate compactor. This creates a dense, load-bearing foundation that distributes vehicle weight evenly and prevents settlement over time.
At this stage, any soakaway drainage systems are also installed and haunched in concrete. A correct drainage gradient, typically 1:40 to 1:60, is established to ensure surface water flows away from the property and does not pool on or around the driveway.
Poor drainage is one of the most common causes of driveway deterioration in the UK, and we plan for it from the very beginning of every project.
A geotextile membrane may also be laid between the sub-soil and sub-base where ground conditions require it, preventing material mixing and reducing future settlement.

Step 5: Edge Restraints & Surface Installation
Solid edging is installed before the surface layer goes down. Edge restraints define the driveway boundary, keep surface materials in place, and prevent edges from spreading or crumbling under vehicle weight over time. For block paving, these are haunched in mortar. For tarmac, kerbs or block paving borders are commonly used.
The surface installation method then depends on the material chosen:
Block paving: a 30–50mm bed of sharp sand is laid and screeded level, blocks are then laid to the agreed pattern, compacted with a wacker plate, and kiln-dried jointing sand is brushed into the joints.
Tarmac: a binder course of coarse aggregate and bitumen is laid and compacted first, followed by a wearing course of finer aggregate for a smooth, clean finish.
Resin-bound: mixed on site and trowelled onto a prepared porous base at 15–20mm depth. Full curing takes 24–48 hours for light use.
Step 6: Finishing, Inspection & Aftercare
Once the surface is laid, we conduct a full clean-up and site inspection before handover. For block paving, sealing is recommended after 2–4 weeks once the jointing sand has fully settled. This protects the surface against oil staining, weed growth, and discolouration.
Most residential driveway installations take between 3–5 days to complete, depending on size and complexity. We provide a clear timeline at the planning stage and keep disruption to your daily routine to a minimum throughout.
Why Surrey Homeowners Choose M Withall Landscapes
Choosing the right contractor matters as much as choosing the right material. At M Withall Landscapes, we bring together design expertise, construction quality, and local knowledge that national companies simply cannot match.
We are a Marshalls-approved installer, one of the most respected accreditations in the UK driveway industry, as well as members of Checkatrade, the Association of Professional Landscapers, and Which? Trusted Traders. These aren’t just badges; they represent a consistent commitment to quality workmanship and customer satisfaction on every project.
As a Caterham-based team, we understand Surrey’s soil conditions, local planning requirements, and the architectural character of properties across the region. Whether you’re in Caterham, Whyteleafe, Oxted, Reigate, or further across Surrey and Kent, we bring the same level of care and finish to every driveway we install.
From the initial consultation right through to the final inspection, everything is managed by our own team, no subcontractors, no fragmented responsibility, and no surprises.
Ready To Get Started? Contact M Withall Today!
If you’re considering a new driveway for your Surrey home, we’d love to talk through your options. We offer a free, no-obligation consultation and can provide a detailed estimate tailored to your property.
Contact M Withall Landscapes today on 020 8150 0088, or get in touch through our website at mwithall.co.uk. Our team is based in Caterham and serves homeowners across Surrey, London, Kent, and West Sussex.

